
Most people don’t take brake caliper cleaning seriously. Even when they hire professionals for washing, they don’t even check whether they clean the brake calipers or not.
If you don’t pay attention to it, your calipers will fail in a matter of months. However, in the worst-case scenario, it will be the cause of a tragic accident.
So washing is essential. If you have time and the necessary tools in your hand, you can wash them at home. You can do it even without removing the calipers.
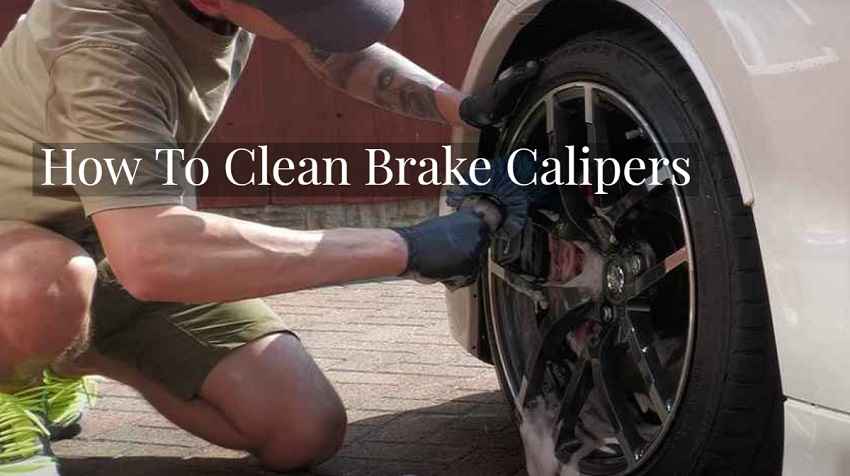
Here we’ve shown how to clean brake calipers in just five simple steps. There are no hard steps. Everything will be simple to grasp and execute.
How To Clean Brake Calipers : Without Removing Tires
Here, we’ll go over how to clean them while the wheels are still attached. We will use some basic tools to make it simple and less time-consuming.
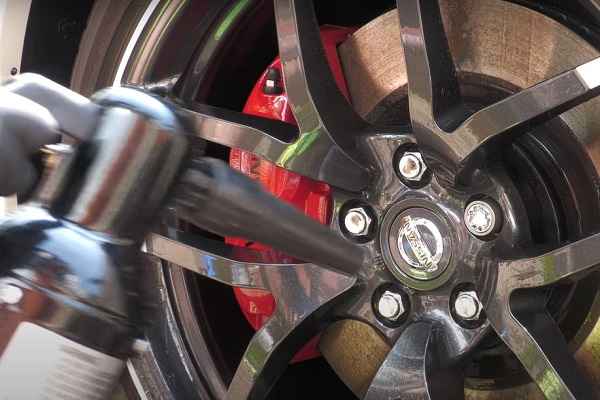
Step 1: Pre Cleaning
Before coming into contact with the brake calipers, our first job is to pre-clean them using an all-purpose cleaner or a citrus-based degreaser. Detergents with citrus ingredients are readily accessible on the market.
The surrounding wheel should also be washed along with the body to clear away any potentially abrasive loose surface dirt.
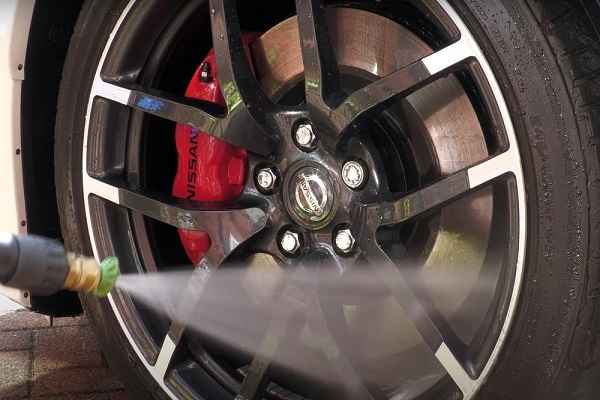
Now, you just need to rinse it with water. You can also use a water sprayer. Don’t need to use any cleansing product at this stage.
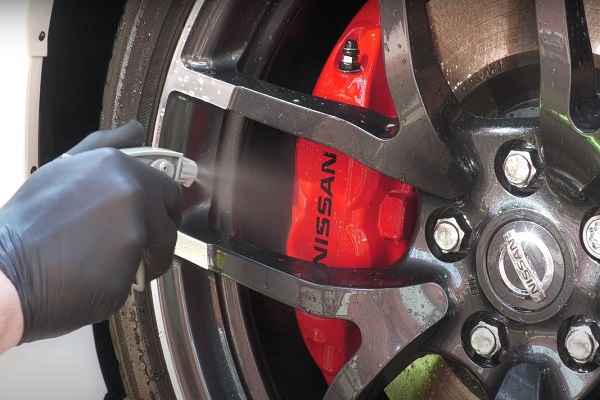
Step 2: Outer Cleaning
Once pre-cleaned, then we can go with either a dedicated wheel cleaner or diluted all-purpose cleaner, depending on the conditions of the calipers.
The face and other easily accessible parts should be washed with a super soft shampoo-primed detailing brush. However, you can also use a slightly stiff bristles.
This particular variety of bristles is still an excellent choice, especially for tight detailing. It will help to remove debris from the surface of more worn-out calipers.
Step 3: Detailed Cleaning
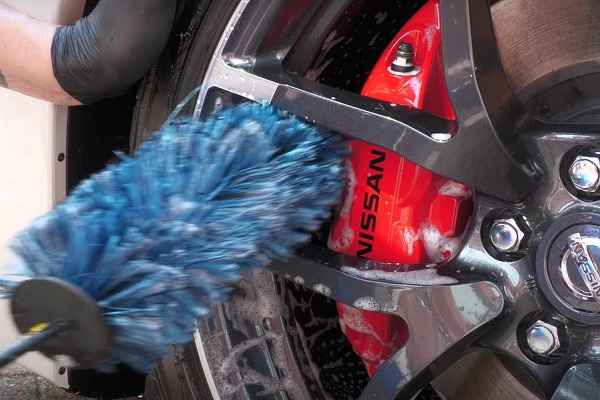

Once the face and open parts have been cleaned properly. Now try to use the Viking long reach brush jewel, which despite their bristles being a tad stiffer. Now, wash the more intricate parts of brake calipers.
Here try not to use a traditional brush because a traditional brush might struggle to reach narrow parts.
With most of the visible part of the caliper now clean, go for a detailed brush. Make an effort to clear any debris from the little space between the caliper and the hub on the opposite side of the caliper.
It’s also a good idea to use the flexibility of the brush in this situation. Because you are able to bend it into a shape that is simple to manipulate around the calipers.
Step 4: Agitation
Though most people do this part in the previous stage, you can do this separately for more appropriate results.
For agitation, you need to use a nylon brush. Here you need to mainly work in between calipers and piston. This area is always skipped because of its unreachable positions. Anyway, scrub all the sides properly and also scrub the pad retaining pin.
Step 5: Final Wash
If you think all the necessary parts are cleaned and scrubbed, then you can start the final wash.
You need to give this part enough time; otherwise, you’ll see the leftover shampoo on its body. You don’t need to use any sponge because the water pressure will clean most of it pretty nicely.
Also, don’t forget to wash between the piston because water doesn’t reach in that part. After washing, check whether there is dirt left or not. Make sure every part is clean appropriately; otherwise, you will see white residue when it will dry.
Step 6: Dry It With Air (optional)
Although this part is not that necessary, if you have time, do this. The reason is when you dry it with pressured air. No white residue will be left. In addition, it will seem super glossy, like a brand-new one.
Use compressed air to blow away the majority of the water if you have one. Also, use a towel to wipe the excess water. You can also put grease in this necessary area at this stage.
If you think it’s not enough, you can also learn how to clean brake calipers and other related parts.
FAQs
Can you clean rusty brake calipers?
Yes, you can, but you need to use a strong rust remover liquid/fluid or agent. Normal rinsing won’t make any difference here.
Is it ok if I wash brake calipers once a year?
That will be really bad. The reason is brake calipers get dirty pretty quickly since they’re attached to the wheels. So it’s more appropriate if you wash it every ⅔ weeks.
Don’t need to clean in detail if you don’t have time. Just washing with soap and water would be better than cleaning once a year.
When should you clean brake calipers?
You should clean brake calipers on a regular basis, ideally every 4-6 weeks, depending on how frequently you use your vehicle and the driving conditions. The reason for this is that brake calipers are exposed to dirt, dust, and other debris, which can accumulate over time and affect their performance.
Can you spray brake cleaner on calipers?
Yes, you can use brake cleaner spray on brake calipers. Brake cleaner spray is a specially formulated solvent designed to remove oil, grease, brake fluid, and other contaminants from brake components, including brake calipers.
Final Word
Hope now you understand how to clean brake callers in just a few effective steps.
Brake calipers are surely one of the critical parts of your vehicle. If you take care of it, it will give its best shot.
Here we’ve shown the whole cleaning process in just five steps. However, you can also clean more accurately if you have time.
Try to wash it every four or five weeks; otherwise the calipers will be jammed by dust and dirt.
