Dashboards are generally made of rigid plastic materials. So it can crack over time due to reduced temper, mishandling, or an accident. A crack in the dashboard isn’t just noisy and annoying, it can even lead to a structural issue causing damage to the dashboard components. So you’ll want to repair a crack in the dash asap.
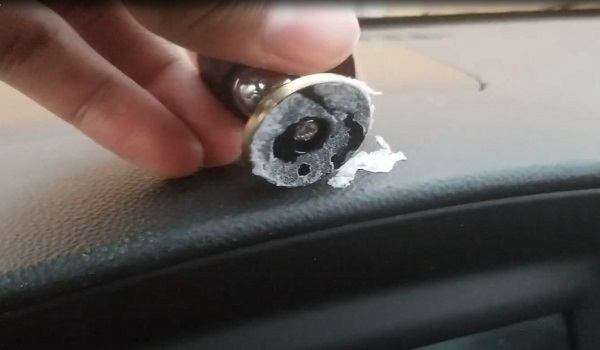
Most car owners turn to adhesives to fix the issue. But many find it’s not adhering properly. So they end up deciding the weak adhesive won’t stick to the dashboard! Some also fail while using adhesive to stick something (like a GPS or Phone Mount) onto the dashboard. But why it’s not sticking properly?
There could be many reasons for it, from choosing the wrong adhesive down to the inability to protect it. But luckily, most of these causes have effective fixes. We’ll learn about the causes and their fixes in this article here.
Adhesive Won’t Stick to Dashboard: Causes & Fixes
You probably want to repair the dashboard or stick something important onto it. If your glue isn’t sticking properly, there could be four causes that we’ve figured out here. Check out what these causes are and how you could fix them.
Wrong Adhesive
Choosing the wrong adhesive could probably be why it’s not sticking to the dashboard. The dashboard plastic is a hard material to bond, so the regular adhesives like wood glue or normal superglue won’t adhere to your cracked dash.

Fix
It has a simple fix which is to find a specially formulated adhesive that’s made for the job. Generally, automotive dashboards are made of plastics Polypropylene, Polycarbonate, or Acrylonitrile-butadiene-styrene (ABS) materials. These are materials with low surface energy and are difficult to bond.
Luckily, some chemical compositions work well with dashboard plastic. The specialized acrylic or poly cement formula is the one that does well to bond properly with the dashboard material. They’re generally water and impact resistant, and you can expect them to not melt due to sunlight or moist weather.
The epoxy-based glues also work well for repairing dashboard cracks. You can mix the epoxy and the amino glue to form a strong, uniform color glue that’ll bind the cracked parts. Another formula that can be used for automotive plastic, like the dashboard material is the cyanoacrylate adhesives, especially its ethyl-cyanoacrylate composition that’s manufactured for adhering to the automotive plastic.
The adhesives for automotive plastic are generally ultrathin and transparent. They can easily move around to reach every tiny corner and create stronger bonds with the dashboard without leaving residues. But make sure to check out the expiry date and use it within the shelf life after opening, which is usually around 6 weeks.
Applying in the Wrong Manner
Choosing the best adhesive for car dashboard material isn’t enough to make it stick perfectly. If you’re applying it in the wrong way or without preparing the surface correctly, the adhesive will still come off from the dashboard.
Fix
To apply the adhesive in the right manner, here are some steps that you need to follow.
- Choose a bright, hot, and sunny day to do that job.
- First, you’ve to prepare the surface area where you want to apply the epoxy, cyanoacrylate, or poly cement glue (which you think is best for the job). Use 280-grit sandpaper to sand the area and create a roughness that can help your adhesive to adhere easily.
- If you’re repairing a cracked dashboard, ensure to rub both sides of the cracked area. It’ll also wipe off the vinyl dressing (if there’s any) that prevents the adhesion.
- After sanding the surface, use a dry & clean cloth to wipe off the dust so that the surface is clean.
- Now prepare your dashboard adhesive. Follow the instruction manual to do that. Some adhesives like two-part epoxy glue require their ingredients to be mixed before application.
- Spread the mixed adhesive evenly using a heat gun onto the outer cracked surface using a binder. Most glues will dry within 15 minutes, so finish the application before that.
- The acrylic or epoxy-based adhesives reach handling strength in 15 minutes but to reach the maximum strength they may require around 24 hours. So you’ve to wait for 24 hours to let the adhesive set.
- You’ve to reapply the adhesive using the heat gun on the inner cracked area as well and wait for 24 more hours to let the glue completely set.
- After that, polish the surface with 500-grit sandpaper until the surface is perfectly leveled.
- To finish off the job, get yourself a primer and topcoat recommended by the manufacturer and apply it evenly throughout the dashboard surface.
Adhesive Liquefies or Melt Due to Weather Exposure
You may have used the right adhesive on your dashboard and also used it in the right manner. But you could still see it coming off the surface if it’s exposed to the sunlight and heat frequently. Humid weather can also ruin the adhesive used to bond the cracked dashboard parts.
What these harsh weather conditions do is liquefy or melt the adhesive. As a result, the melted adhesive runs down towards the foam layer or upwards through the outer fabric. Over time, the adhesive baked in the sun could soften and come in contact with your dashboard’s outer fabric to ruin it badly.
Fix
If you see the dash has become sticky, don’t worry. There’s an effective and permanent solution for this dashboard issue. You’ve to do the following things to ensure your bonded dashboard surface is effectively sealed and protected.
- Find a surface cleaner that’s formulated to effectively remove the sticky plasticizers, debris, and dirt. You can also choose a good degreaser for car paint to do the job. Apply it as per the instructions and wipe off everything on the dashboard surface to prepare it for a successful sealing.
- Now apply a surface coating or a dashboard protectant that bonds strongly to the dashboard surface. It’ll create a thin yet flexible & strong layer and after a few light coats, the dash surface should be perfectly sealed. So the adhesive can’t melt further, and there will be no more sticky residue on your dashboard as well.
Prevent Damage to Adhesive
Adhesives and car plastics are prone to damage from sunlight and its harmful UV rays. The humidity also causes damage to the car interior, including a repaired dashboard where adhesive is used.
So before your adhesive gets damaged or melted, it’s better to prevent it than to cure it. The preventive measures aren’t permanent but they could still help the adhesive, used to repair the dashboard, to stick longer.
Fix
To keep your adhesive protected from sunlight and moisture, here are a few things you need to do.
Use Coating or Protectants:
The dashboard coatings or protectants seal the surface and keep adhesive from melting. They also inhibit the sunlight and prevent harm from the UV rays. But you shouldn’t wait for it to melt or the dashboard to become sticky to apply it. You can apply the protectant once in a while, so the surface stays protected regularly.
Park in the Shade:
Always try to park the car in a covered area or under some shade. It’s the best way to prevent your car from UV damage and excessive heating.
Use Windshield Cover:
Get a windshield cover to protect your car from the sun, especially on hotter days. It limits UV exposure to your dashboard and keeps the car cooler to prevent soft plastics inside the car from drying out.
Apply Car Wax:
Some good car waxes are infused with pure graphene. Graphene is a heat repellent and a UV inhibitor. So the wax can be effective enough to keep the sun out of the car.
Dehumidify:
Excessive moisture can also break down the strength of the adhesive and get it liquified. So there are a few things you could do to dehumidify the interior. Turn the air conditioner on for a prolonged time. Use a moisture absorber like a portable dehumidifier to get rid of excessive moisture. You can use the baking soda and keep its box open to absorb the moisture as it’s a natural moisture absorber.
Also read : How To Remove Super Glue From Car Dashboard – No More Super Glue Hassles
Adhesive Won’t Stick To Dashboard : FAQs
Let’s get some FAQs answered below.
Is a 2-part adhesive better for automotive plastic?
Epoxies or cyanoacrylate adhesives are available in a 2-part version. When both parts of these adhesives are mixed (where one’s generally the hardener), they can provide a highly durable bond to fill plastic gaps or cracks. They have the high structural strength to withstand heavy loads and they also don’t shrink when exposed to extreme temperatures. So the 2-part adhesives are a better option for automotive plastic.
Can I replace the Dashboard?
Yes, you can replace the full dash but it’ll also require you to buy all the individual components alongside the dashboard itself. So assumably, the cost of replacing the entire dashboard is a bit higher.
How can I remove excess glue from my car dashboard?
Dampen a rag or a cotton ball in the white vinegar or acetone-like nail polish remover. Place the soaked rag or ball on the glue and dab it until it softens. Use a dry rag or plastic scraper to wipe off the softened glue.
Final Words
Your job is half done if you’ve identified why your adhesive won’t stick to the dashboard. If it’s about choosing the right adhesive, go for epoxy, acrylic, or cyanoacrylate glue. To apply it properly, follow the steps discussed in the article including sanding and preparing the dashboard surface in the right way.
Use a protectant or coating that seals the adhesive and protects it from melting. Finally, take preventive measures to protect the dashboard and the adhesive used on it from sunlight, heat, and moisture. This approach will make sure your adhesive successfully sticks to the dashboard for repairing a crack or putting something onto it.
Related Posts
How To Remove Sticky Residue From Leather Car Seat : A Step-By-Step Guide
Is It Illegal To Remove Airbag Stickers Inside Your Car
How to Remove Road Salt from Car Windshield
How To Remove Glue From Car Rims Without Leaving Any Trace

